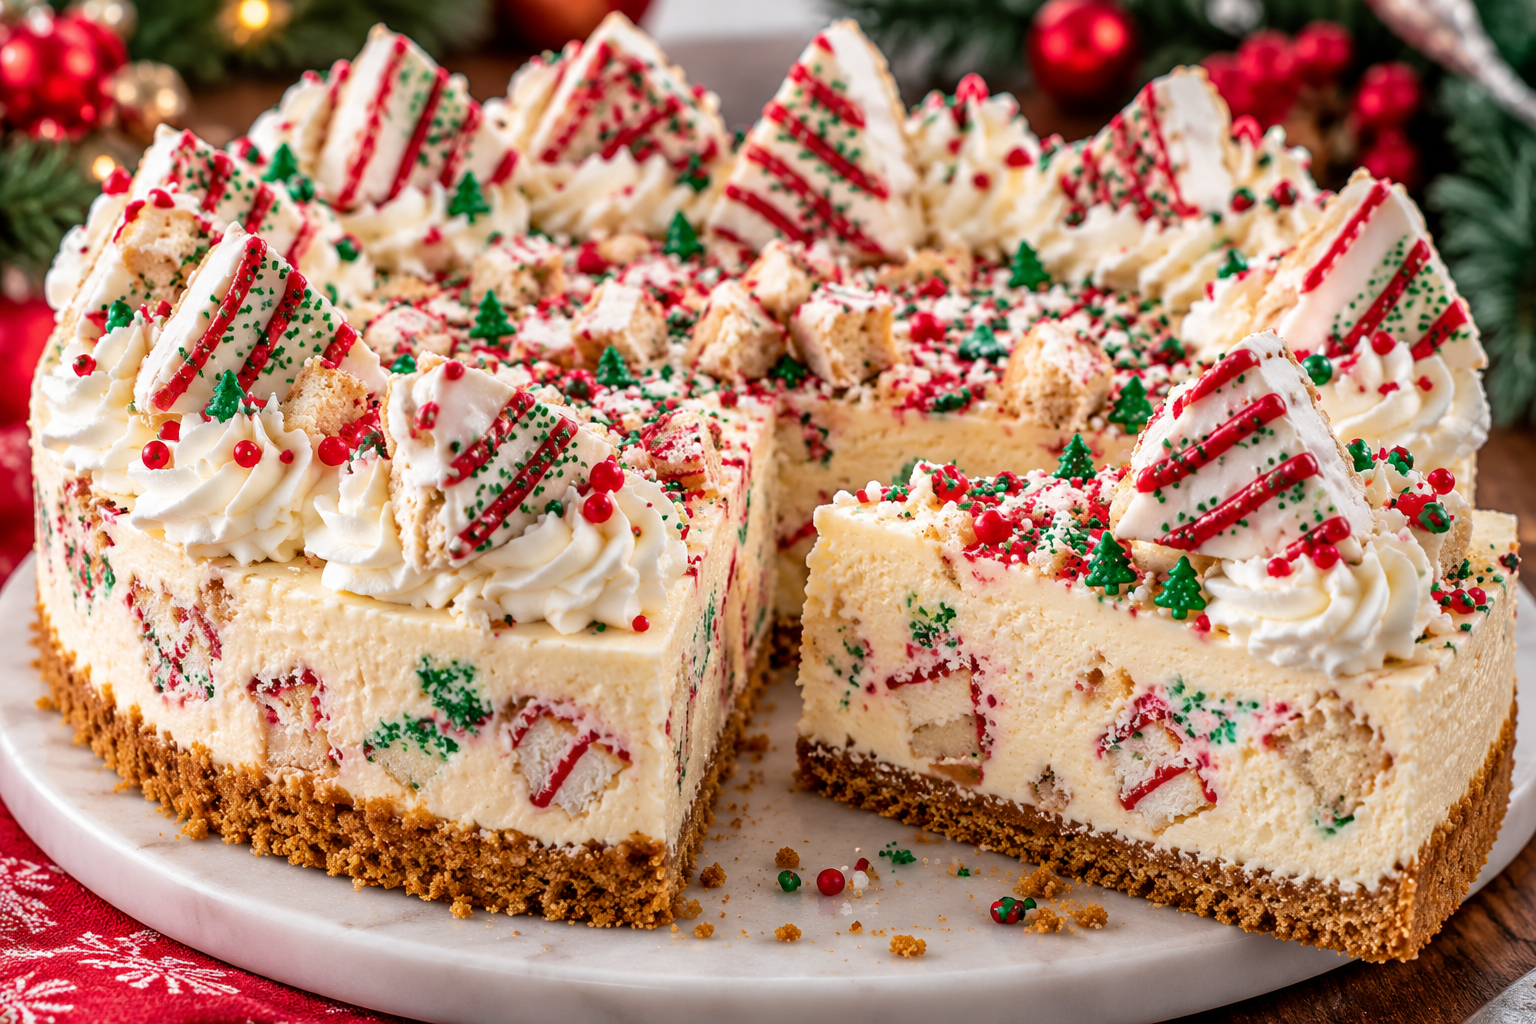
Easy No-Bake Christmas Little Debbie Tree Cheesecake
Looking for a festive dessert that will impress everyone at your Christmas celebration? This Easy No-Bake Christmas Little Debbie Tree Cheesecake combines the nostalgic sweetness of Little Debbie Christmas Tree Cakes with a rich, creamy cheesecake filling and a buttery graham cracker crust.
It’s a beautiful holiday dessert featuring fluffy vanilla cheesecake, pieces of soft Christmas Tree Cakes, white chocolate, and colorful red and green sprinkles. Best of all, you don’t need to turn on the oven!
Whether you’re planning a Christmas dinner, holiday party, or festive family gathering, this easy no-bake cheesecake is sure to become a seasonal favorite.
Table of Contents
Why You’ll Love This Christmas Tree Cheesecake
- No baking required: An easy holiday dessert that doesn’t need an oven.
- Perfect for Christmas parties: Festive colors and adorable Christmas tree decorations make it a stunning centerpiece.
- Creamy and delicious: A rich cream cheese filling pairs beautifully with soft vanilla snack cakes.
- Make-ahead friendly: Prepare it the day before your holiday celebration.
- Simple ingredients: Everything is easy to find during the holiday season.
Recipe Details
- Prep Time: 25 minutes
- Chill Time: 6 hours
- Total Time: 6 hours 25 minutes
- Servings: 12 slices
- Difficulty: Easy
- Equipment: 9-inch springform pan, electric mixer, mixing bowls
Ingredients
For the Graham Cracker Crust
- 2 cups graham cracker crumbs (about 200 g)
- 7 tablespoons unsalted butter, melted (100 g)
- 2 tablespoons granulated sugar
For the Christmas Tree Cheesecake Filling
- 16 oz full-fat block cream cheese, softened (450 g)
- 3/4 cup powdered sugar (90 g)
- 1 teaspoon vanilla extract
- 1 1/2 cups cold heavy whipping cream (360 ml)
- 4 Little Debbie Christmas Tree Cakes, chopped into small pieces
For the Festive Topping
- 4 oz white chocolate (115 g), melted and slightly cooled
- 2 Little Debbie Christmas Tree Cakes, cut into decorative pieces
- 1/2 cup whipped cream for decoration
- Red and green Christmas sprinkles
- Optional red decorating icing
How to Make No-Bake Christmas Tree Cheesecake
Step 1: Prepare the Graham Cracker Crust
In a medium mixing bowl, combine the graham cracker crumbs, melted butter, and granulated sugar.
Stir until the mixture resembles damp sand and the crumbs are evenly coated with butter.
Transfer the mixture to a 9-inch springform pan. Press firmly across the bottom using a measuring cup or the back of a spoon.
Place the crust in the refrigerator for at least 20 minutes while preparing the cheesecake filling.
Pro Tip: A firmly packed crust helps the cheesecake hold together when sliced.
Step 2: Make the Cream Cheese Filling
Place the softened cream cheese in a large mixing bowl.
Using an electric mixer, beat for approximately 2 minutes until smooth and creamy.
Add the powdered sugar and vanilla extract. Continue mixing until completely combined.
Make sure the cream cheese is at room temperature to prevent lumps.
Step 3: Whip the Heavy Cream
In a separate chilled bowl, whip the cold heavy cream until stiff peaks form.
Gently fold the whipped cream into the cream cheese mixture using a spatula.
Work slowly to maintain the light and fluffy texture.
Avoid overmixing, which can deflate the whipped cream.
Step 4: Add the Christmas Tree Cakes
Chop four Little Debbie Christmas Tree Cakes into small bite-sized pieces.
Gently fold the cake pieces into the cheesecake mixture until evenly distributed.
The soft vanilla cakes add delicious pockets of sweetness and festive color throughout the filling.
Step 5: Assemble the Cheesecake
Remove the chilled graham cracker crust from the refrigerator.
Spoon the cheesecake filling over the crust and spread evenly.
Smooth the top with a spatula.
Cover the pan carefully and refrigerate for at least 6 hours, preferably overnight, until the filling becomes firm enough to slice.
Step 6: Decorate the Cheesecake
Once the cheesecake is fully chilled, carefully remove the springform pan ring.
Drizzle the slightly cooled melted white chocolate over the surface.
Pipe whipped cream around the edges and arrange pieces of Little Debbie Christmas Tree Cakes on top.
Finish with red and green sprinkles and optional red decorating icing.
For the prettiest presentation, decorate shortly before serving.
Step 7: Slice and Serve
Use a sharp knife to cut the cheesecake into 12 slices.
Wipe the knife clean between cuts for smooth, beautiful slices.
Serve immediately while chilled.
Expert Tips for the Perfect Christmas Cheesecake
Use Full-Fat Cream Cheese
Full-fat block cream cheese gives the cheesecake its rich flavor and helps the filling hold its shape. Avoid whipped or spreadable cream cheese.
Chill the Cheesecake Overnight
Although six hours is generally enough, overnight refrigeration creates a firmer texture and makes slicing easier.
Don’t Overmix the Filling
Once you add the whipped cream, fold gently. This keeps the filling airy and prevents it from becoming too soft.
Use Cold Heavy Whipping Cream
Cold cream whips more effectively and creates a more stable cheesecake filling.
Decorate Before Serving
Christmas Tree Cakes and sprinkles look their best when added shortly before serving. This prevents the decorations from absorbing excess moisture.
Delicious Recipe Variations
Chocolate Christmas Tree Cheesecake: Add 2 tablespoons of sifted cocoa powder to the cream cheese mixture for a chocolate version.
Oreo Christmas Cheesecake: Replace the graham cracker crust with crushed Oreo cookies and melted butter.
Mini Christmas Cheesecakes: Divide the crust and filling between individual dessert cups for an easy party dessert.
Peppermint Christmas Cheesecake: Add a small amount of peppermint extract to the filling and garnish with crushed candy canes.
Extra White Chocolate Cheesecake: Fold 2 ounces of melted, cooled white chocolate into the cream cheese mixture before adding the whipped cream.
How to Store Christmas Tree Cheesecake
Refrigerator
Store the cheesecake in an airtight container in the refrigerator at 40°F (4°C) or below for up to 3–4 days.
For best results, keep extra cake decorations separate until serving.
Freezer
Freeze the undecorated cheesecake for up to 2 months.
Wrap it tightly in plastic wrap and place it inside a freezer-safe container.
Thaw overnight in the refrigerator before decorating.
Make-Ahead Instructions
Prepare the cheesecake one day before your Christmas celebration.
Allow it to chill overnight, then decorate with white chocolate, whipped cream, and Christmas Tree Cakes shortly before serving.
Frequently Asked Questions
Can I make Little Debbie Christmas Tree Cheesecake without baking?
Yes! This recipe requires no oven. The graham cracker crust sets in the refrigerator, while whipped cream and full-fat cream cheese create the creamy filling.
How long does no-bake Christmas cheesecake need to chill?
Refrigerate it for at least six hours. Overnight chilling is recommended for the firmest texture and cleanest slices.
Can I use chocolate Christmas Tree Cakes?
Absolutely! Chocolate Christmas Tree Cakes make a delicious variation and pair wonderfully with vanilla or chocolate cheesecake filling.
Why is my no-bake cheesecake too soft?
Common reasons include using low-fat cream cheese, not whipping the heavy cream enough, or insufficient chilling time.
Can I make this cheesecake ahead of time?
Yes. Prepare it one day ahead and refrigerate overnight. Add the decorative toppings before serving for the freshest appearance.
Can I make individual Christmas cheesecake cups?
Yes! Layer the graham cracker crumbs, cheesecake filling, and chopped Christmas Tree Cakes in small dessert glasses. Refrigerate until set and decorate before serving.
Final Thoughts
This Easy No-Bake Christmas Little Debbie Tree Cheesecake is the perfect combination of creamy cheesecake, nostalgic holiday snack cakes, and beautiful Christmas decorations.
With its buttery graham cracker crust, fluffy vanilla filling, and festive red and green toppings, it’s a wonderful dessert for Christmas dinners, holiday parties, and family celebrations.
Save this recipe for your holiday baking plans and share it with anyone who loves easy Christmas desserts!