Easy Chocolate Mousse Brownies: Ultra Fudgy Chocolate Dessert
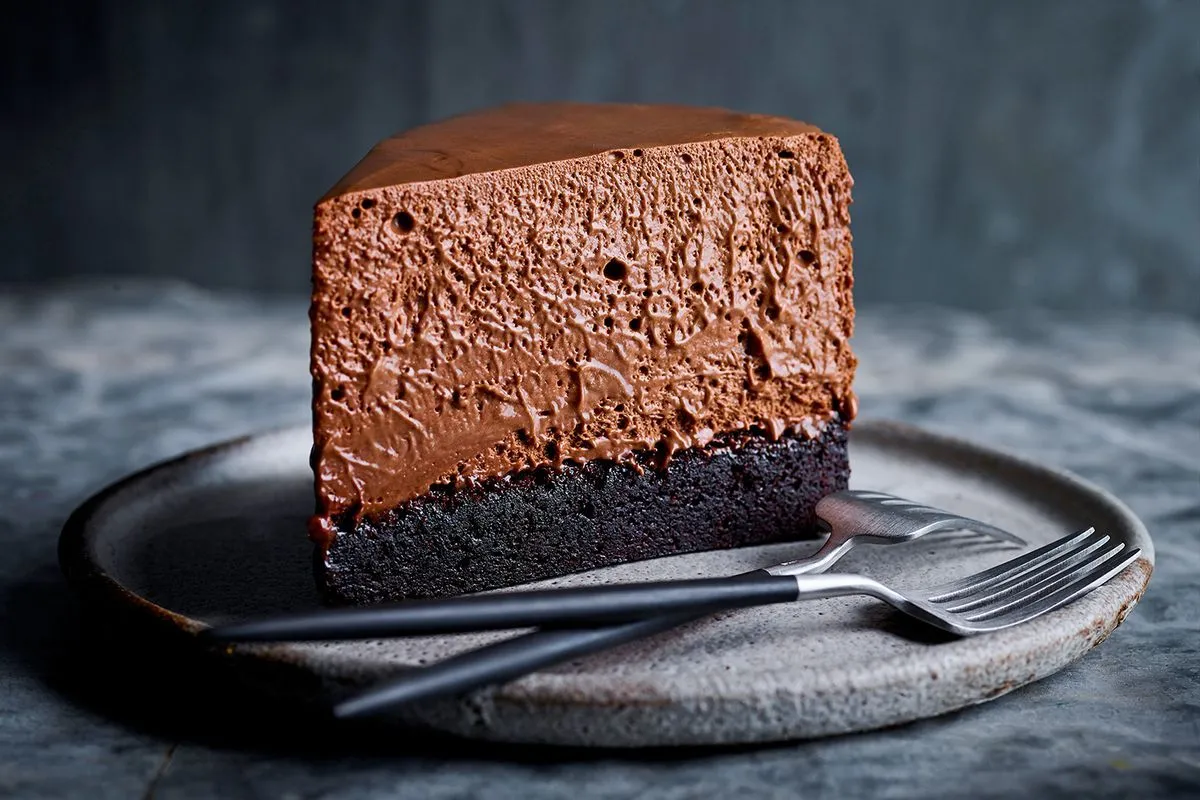
There’s a moment when you cut into these brownies and the knife comes out slightly wet, coated in something richer than any ordinary brownie batter. That’s the mousse layer doing its job, a silky, dense middle sandwiched between a fudgy brownie base and a cloud of whipped chocolate on top. This is the recipe for anyone who thinks regular brownies just don’t go far enough.
Table of Contents
Three layers of chocolate, three different textures, one pan. It sounds like a project, but each layer comes together quickly, and the payoff is a dessert that looks like it belongs in a bakery display case.
Why You’ll Love This Chocolate Mousse Brownies Recipe
- Three textures in one bite. Fudgy brownie base, dense mousse center, and airy whipped top.
- No fancy equipment needed. A hand mixer and a saucepan get you through every layer.
- Deeply chocolatey without tasting artificial. Real melted chocolate does the heavy lifting, not just cocoa powder.
- Impressive presentation for minimal skill. The layered look does all the visual work for you.
- Make-ahead friendly. These need chill time anyway, so they’re built for prepping in advance.
Ingredients You’ll Need
Bake and cool the brownie base first, since both mousse layers need time to set on top of it.
For the Brownie Base
| Ingredient | Amount |
|---|---|
| Unsalted butter | ½ cup (1 stick) |
| Semi-sweet chocolate, chopped | 4 oz |
| Granulated sugar | ¾ cup |
| Eggs | 2 large |
| Vanilla extract | 1 teaspoon |
| All-purpose flour | ½ cup |
| Unsweetened cocoa powder | ¼ cup |
| Salt | ¼ teaspoon |
For the Chocolate Mousse Layer
| Ingredient | Amount |
|---|---|
| Semi-sweet chocolate, chopped | 6 oz |
| Heavy whipping cream, cold, divided | 1 ½ cups |
| Powdered sugar | 2 tablespoons |
| Gelatin, unflavored | ½ teaspoon |
| Cold water | 1 tablespoon |
For the Whipped Chocolate Topping
| Ingredient | Amount |
|---|---|
| Heavy whipping cream, cold | 1 cup |
| Unsweetened cocoa powder | 2 tablespoons |
| Powdered sugar | 2 tablespoons |
| Chocolate shavings, for garnish | 2 tablespoons |
How to Make Chocolate Mousse Brownies
Each layer needs time to set before the next goes on, so plan for this to happen in stages rather than all at once.
Step 1: Prep the Pan and Oven
Preheat your oven to 350°F. Line an 8×8-inch pan with parchment paper, leaving an overhang on two sides for easy removal later.
Step 2: Make the Brownie Batter
Melt the butter and chopped chocolate together in a microwave-safe bowl in 20-second bursts, stirring between each, until smooth. Whisk in the sugar, then add the eggs one at a time, followed by the vanilla. Fold in the flour, cocoa powder, and salt, stirring just until no streaks of flour remain.
Step 3: Bake the Brownie Base
Pour the batter into your prepared pan and spread evenly. Bake for 22 to 25 minutes, until a toothpick inserted in the center comes out with a few moist crumbs, not wet batter. Let cool completely in the pan, about 1 hour, before adding the mousse layer.
Step 4: Bloom the Gelatin
Sprinkle the gelatin over the cold water in a small bowl and let sit for 5 minutes to soften. This step keeps the mousse layer stable enough to slice cleanly once chilled.
Step 5: Make the Chocolate Mousse Layer
Melt the chocolate in the microwave in 20-second bursts, stirring between each, until smooth, then let cool slightly. Microwave the bloomed gelatin for about 5 seconds, just until liquid, then stir it into the melted chocolate. In a separate bowl, whip ½ cup of the heavy cream with the powdered sugar until soft peaks form. Fold this into the melted chocolate to loosen it, then gently fold in the remaining 1 cup of whipped cream in two additions, being careful not to deflate the mixture.
Step 6: Spread the Mousse and Chill
Spread the mousse evenly over the cooled brownie base. Refrigerate for at least 2 hours, until firm to the touch, before adding the whipped topping.
Pro tip: Work quickly once the melted chocolate and gelatin mixture is combined. It firms up fast, and folding it into cream that’s already stiffened can leave you with streaky, uneven mousse instead of a smooth layer.
Step 7: Make the Whipped Chocolate Topping
Whip the cold heavy cream, cocoa powder, and powdered sugar together until stiff peaks form. Spread or pipe over the chilled mousse layer, then scatter chocolate shavings on top.
Step 8: Chill and Slice
Refrigerate for another 30 minutes to let the topping set slightly before slicing. Use a sharp knife wiped clean between cuts for the neatest layers.
Nutritional Information (Per Serving)
Based on a batch cut into 16 bars. Values are approximate and will vary based on exact brands used.
| Nutrient | Amount |
|---|---|
| Calories | 245 |
| Total Fat | 19g |
| Saturated Fat | 11g |
| Carbohydrates | 17g |
| Sugar | 12g |
| Protein | 3g |
How to Store Chocolate Mousse Brownies
Because this dessert relies on chilled mousse and whipped cream layers, refrigeration isn’t optional the way it is with a standard brownie.
- Refrigerator: Store in an airtight container for up to 4 days. Keep chilled until ready to serve, since the layers soften at room temperature.
- Freezer: Freeze individual bars without the whipped topping for up to 1 month. Thaw in the fridge overnight, then add fresh whipped topping before serving.
- Room temperature: Fine for up to 30 minutes while serving, but any longer and the mousse layer will start to lose its structure.
Frequently Asked Questions
Can I skip the gelatin in this chocolate mousse brownies recipe?
You can, though the mousse layer will be softer and harder to slice cleanly. If skipping it, chill the bars longer, at least 3 to 4 hours, and use a very sharp knife when cutting.
Why did my chocolate mousse brownies turn out streaky instead of smooth?
This usually happens when the melted chocolate mixture cools too much before folding, or when it’s folded into cream that’s already fully whipped to stiff peaks. Fold quickly while the chocolate mixture is still soft and pourable.
Can I make chocolate mousse brownies ahead of time?
Yes, and it actually works in your favor. Make the full recipe up to 2 days ahead and keep refrigerated, since the layers need to chill anyway. Add fresh chocolate shavings just before serving for the best presentation.
Do I need a stand mixer to make the mousse and whipped topping for this recipe?
No, a hand mixer works perfectly well for both layers. Just make sure your bowl and beaters are cold, especially for the whipped cream, since this helps it whip up faster and hold its structure better.
Ready to Bake?
These chocolate mousse brownies take everything you love about a classic fudgy brownie and stack two more layers of chocolate indulgence on top. It takes a little more patience than a one-bowl brownie, but the payoff is a dessert that looks and tastes like it came from a professional kitchen. Give this recipe a try for your next special occasion, and if you make a batch, snap a photo and tag it so others can see how yours turned out.